Action Editor
Use the Action Editor to create an animation (a motion or a transformation) that you will apply to one or more objects.
For example, you might create an action to have an object follow the mouse cursor. You might create a breathing action where an object expands and contracts as if breathing.
In this tutorial, we cover the following topics:
Assigning actions
Selection tab
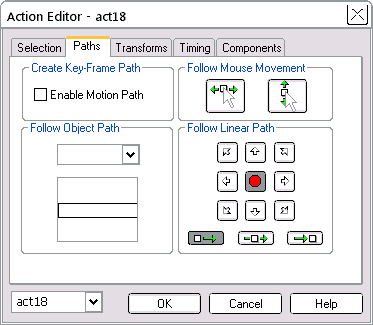
Paths tab
Follow Object Path
Hierarchical motion
Follow Mouse Movement
Follow Linear Path
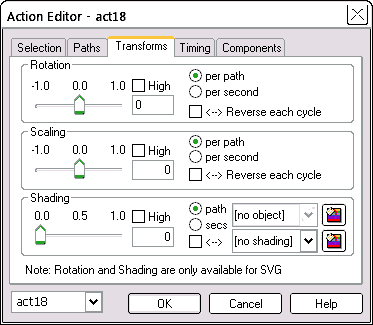
Transforms tab
Transforms common features
Rotation transform (SVG only)
Scaling transform (HTML and SVG)
Shading transform (SVG only)
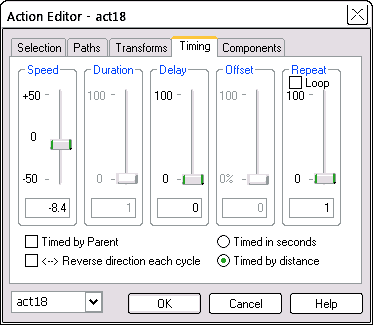
Timing tab
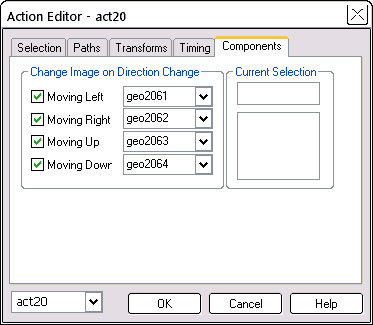
Components tab
Change Image
Assigning actions
After you have created an action, assign the same action to as many additional objects as you like, one at a time via the
Object Editor > Components tab.
If the current object does not have an action already assigned, and you open the Action Editor, you will see this dialog:
[Image of no action assigned dialog]
If the current object already has an action, the Action Editor will select that action for editing. The Breathe, Move and Follow objects, already have actions assigned. If you are viewing this page in your workpage, select one of those objects and then click the Action Editor button on the tools (left-hand) toolbar. This will allow you to view and edit the existing action.
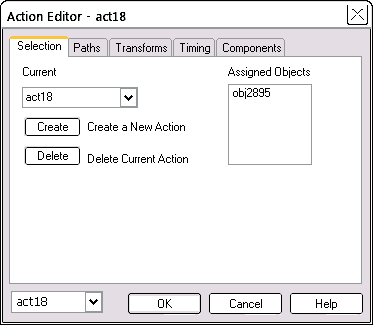
Selection tab
Use the Selection tab to choose the action to edit. The initial action will be for the current object -- maybe a new action -- or failing that, an existing action.