SiteSpinner Pro Tutorials banner
< Tutorials Home
SiteSpinner Pro logo
Letter
Heart
Female
Ellipse
Curvy Shapes

The Straight Shapes tutorial covers mainly shapes with straight lines. Whether  rectangles with rounded corners are straight or curvy is something of a gray area. We've opted to think of them as straight.

For this tutorial, turn the snap grid off -- this will allow you much finer adjustments. Or, hold the Shift key down to disable it temporarily while you drag.

In this tutorial, we'll look at the curvy shapes -- ellipses (circles) and paths (curves). Topics we cover here are:

Ellipse (and circle)
Pie shapes
Arcs
Paths and curves
Tips on paths and curves
Curved tab buttons
Titles as paths

Ellipse (and circle)

Create an ellipse object as you did a rectangle, but this time select the Ellipse on the left Tools toolbar, or again, from the Object menu.


Pie shapes

To convert the Ellipse into a pie shape, select the Vertex Editor and adjust the control boxes to get the size of pie desired.

There are two sizing handles top left and bottom right. Drag either of these to change the size and shape of the ellipse.

There are two little x's at the right hand edge of the ellipse. Drag one or both to make your pie.

Ellipse
Ellipse button
Vertex Editor button
Pie
Sizing handle
Sizing handle
Wedge
Ellipse drag points
Creating a wedge or pie
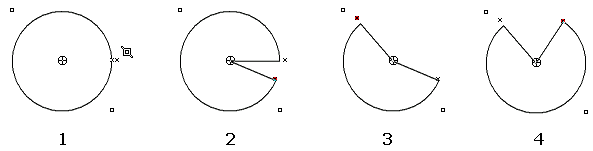
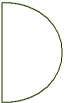
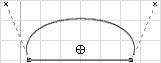
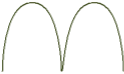
Image 1 shows the ellipse, the Vertex Editor selected, and the mouse cursor approaching the right-hand side.

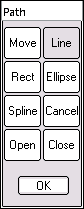
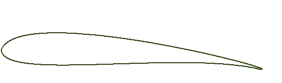
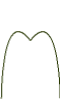
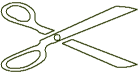
Image 2
shows dragging the inside little "x" with the mouse downwards, clockwise. Notice how the last selected point shows as a little red square.

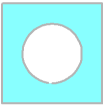
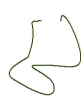
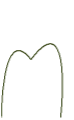
Image 3
shows the same treatment for the outside little "x" of the pair the top left corner. This time we are dragging the x upwards and around, anti-clockwise.

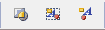
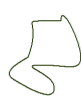
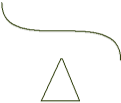
Image 4
shows the result of dragging the bottom little x anti-clockwise too.

It's easier to do than read about, so do it!

Don't forget to deselect the Vertex Editor when you are done. Use one of the arrow buttons at the top left. If you forget, and you will, seeing the little elves on the left will remind you!

Rotate and skew tool
Move and stretch tool
Vertex edit cursor
Little circle
Arcs
To make an arc rather than a pie, check the Open End box in the Geometry Editor > Outline tab.
Arc 1
Arc 2
Open end checked
Paths and curves

Paths can be straight or curved, in which case they may be called splines or Bezier curves. Select the "Draw a Path" tool on the Tools toolbar. This should display the Path menu shown on the right, which allows you to chose the kind of path. As you draw, a right-click will show a context menu with similar options to those on the Path menu

Line
, as you might guess, draws lines. Click on your page to set a start point and click again to set each new point.

Draw discontinuous paths by clicking the Move button. This allows you to continue drawing, perhaps in some other style from some other place on the page. The new section will form part of the current path.

Rectangle and Ellipse are very similar to those covered elsewhere.

Spline (curve)
needs some further explanation. Click "Spline" and then click on the page to place a point. Two subsequent mouse clicks set control points that you can use to transform the curve. A fourth click is the end point, or the start of the next section of curve if you choose to continue.

Add in other kinds of path by clicking on the appropriate Line, Rect or Ellipse button on the Path menu. Use the Move button to start a new section.

Open
and Close control the manner in which your drawing ends. Open allows drawing to stop at the last point you place. Close, will join the last point to the first point to make a closed shape.

To end drawing, select an option from the right-click context menu, or click the OK button on the Path menu -- not the Close!

Outline thickness and color:
These paths all default to zero thickness. If you require an outline, set the thickness and color from the Quick Editor or Geometry Editor > Outline tab.

Later Editing: 
Use the Vertex Editor to change the position of any point afterwards. Or insert and delete points.

Join
two or more objects together to make one path with main menu Arrange > Merge, or use the Merge button on the Arrange toolbar.


Path menu
Curve button
Fat lines
Circle
Path
Group/ungroup buttons
Semicircle
Curve 2
Curve1
Aerofoil
Teardrop
Curved line
Tips on paths and curves

Once again, you will learn best by doing, but here are a few tips that may not be so obvious when you are starting out.

As with polygons, holding the left mouse button down and dragging will produce a freehand curve.


To produce a symmetrical shape, both drag handles should be at comparable angles, and both should be of the same length.


Using the grid guide and zooming in will help. To disable the snap grid temporarily, hold the Shift key down.


To produce a smooth curve, keep both drag handles  parallel to each other. Any angle between the two will cause a discontinuity.
Open shape
Closed shape
Symmetrical shape
Grid button
Snap grid on/off
Tooth shape 2
Tooth shape 3
Tooth shape 1
Zoom in or out button, and Unzoom
Tooth shape 5
Tooth shape 4
Tooth shape 1
To produce a discontinuous straight section insert a new point at point 0 with the Vertex Editor. Then by adding more points, you can make a polygon which forms part of the shape.


When creating your curve, start with more curved sections than you really need -- you can delete curves with the Vertex Editor, but you can't easily add any more in.

You can make another curve, then Merge it with your first.

You can add another curve by extruding a copy.  As with a polygon, use the Vertex Editor to extrude.


Use Webdings, Wingdings, or any other font to make a title and convert that title to a path.


Use the Quick Editor > Object tab to scale up a shape to work on it -- then scale down again to set the final size.


Arc and line
Curve and triangle
Tooth
Double tooth
Scissors
Curved tab buttons

In the Straight Shapes tutorial, we describe using rounded rectangles as tab buttons. In the same way, we can use curved shapes as tabs too.

To help get a symmetrical tab, you may find it helpful to turn the grid guide on and zoom in.

Curve button
Grid button
Zoom in or out button, and Unzoom
Symmetrical button
Blank button
Home
Music
Photos
Fans
Blank button
Music
Photos
Fans
Titles as paths

Right click on any title object and click Convert to Path from the popup menu. This will convert a Title into a Path object (curve). From there, you can do all the operations you would do on any other curve.

This is useful if you want letters or anything in a fantasy font to form the base of your shape. You are not restricted to letters and numbers, nor do you have to worry about web-safe fonts.
Galaxy
Galaxy
Galaxy
Star
Star
Star
See also
Rectangles with rounded corners
Buttons tutorial

Tutorials banner