Skewing is somewhat like rotation but on a single axis. It slides an object’s top and bottom edges or right and left edges in opposite directions. The skewing operation appears to shift an object sideways or laterally and can yield some dramatic and interesting effects. For example, you can make image objects appear to be falling randomly like leaves from a tree, or you can create the appearance of three-dimensional cubes out of images or rectangles.
Code, text, table, or foreign objects may not be skewed.
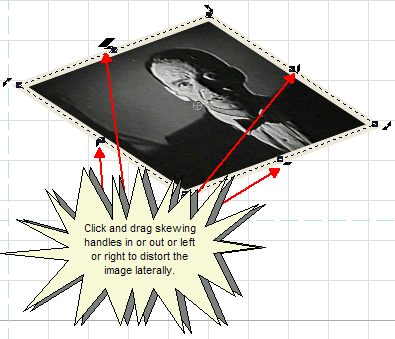
The easiest way to skew an object is manually in the Work Window using your mouse. With an object selected and the Object Edit button in the Components Bar activated, you can click and drag the object’s four skewing control points left and right or in and out to skew the object vertically or horizontally. You will know that your mouse is over a skewing control point when your mouse pointer becomes a black parallelogram. As you drag, the degree of the skew is displayed near the mouse pointer.
You can skew an object to create unusual effects.
When the Snap Grid is enabled, an object is skewed by whole degrees. For more information, see Snap Grid.
If you require precision when skewing objects, you can use the X and Y Skew controls in either the Object Editor or the Quick Properties Editor. You can select an object to skew, and then use the controls to adjust the skew in 1 degree increments either horizontally or vertically. For more information, see Object Editor Dialog Box and Quick Properties Editor Dialog Box .
Use any of the following procedures to skew an object:
In the Work Window:
 in the Components
Bar
in the Components
Bar
OR
Click the Object Edit button:  in the Components Bar.
By default, unless another tool is selected in the Components Bar, the Page Layout button is active.
Using the Quick Properties Editor:
OR
Click the Quick Properties Editor button:  in the Components Bar
OR
Select Object>Quick Properties Editor.
The Quick Properties Editor dialog box will open.
OR
Enter a skew value in the box.
Use the Skew Y spinner to skew the object vertically
OR
Enter a skew value in the box.
Using the Object Editor:
OR
Click the Object Editor button:  in the Align Bar
OR
Select Object>Object Editor.
The Object Editor dialog box will open.
OR
Enter a skew value in the box.
Use the Skew Y spinner to skew the object vertically
OR
Enter a skew value in the box.

